Ahhh analogue models… Those beautiful little (or not so little) worlds inside a box, captivatingly beautiful, impossibly detailed… (sorry, getting carried away, am I?). This week, Alex Hughes gives us the insider’s report on what actually goes on in analogue modelling labs when the “Experiment running, do not disturb!!” sign is on the door.
 Analogue models have been around for a couple of centuries. They’ve been applied to study a variety of geological phenomena taking place at a wide range of temporal and spatial scales, from microfracture initiation to the dynamics of subduction. Most of these processes are very difficult (or impossible) to observe directly, so modellers have devised ways to recreate them in the lab. This gives us insight to better understand how the natural world we see came to be the way it is. Whilst analogue model outputs are often so mind-blowingly beautiful that one wonders whether they should sit in an art gallery, the process that goes into creating them is…well…less joyful at times. As a recently graduated PhD who spent a significant amount of time in an analogue modelling laboratory, I thought I’d try to give some insights as to what it’s like.
Scaling laws control everything – even you
The three principles for scaling analogue models were defined by Hubbert (1937). Models should observe geometric, kinematic and dynamic similarity with nature. For the lab worker, these laws govern two important factors: the size of the model itself (and amounts of material to build it!), and, more impactfully, the length of time it will take to complete the process from beginning to end. Choose ‘poorly’ and you might find yourself hostage to an experiment which not only took an age to get set up, but requires attention at frequent intervals through both day and night over a period that can last several weeks to complete. Break out the sleeping bags! And, when you thought you were done, you still have to clean up the lab.
Creating the spectrum of sand colours is messy business
Granular materials are commonplace within analogue modelling, being excellent for simulating upper-crustal deformation. Quartz sand, the most popular of the lot, can be witnessed in a plethora of colours across different works. Most labs have their own “standard” using certain colours to denote certain stages in a model. If only it was as simple as ordering coloured sand, ready to be used (business idea anybody?). If you’re one of the lucky modelling laboratories, you’ll have a supplier who will deliver bags of super-high purity, well-sorted, washed quartz sand, leaving the dyeing job to you. If not (you may be able to guess to which I belong), then, before you even think of colour, you have a painstaking process ahead of you; washing and sieving the sand in order to remove particles that are too small and would have an undesirable impact on the mechanical properties of the material when subject to stress (dynamic similarity, remember?). During this process, the amount of fines which emanate from the sand will proceed to cover you and your environment in a layer of dirt and dust as thick as if you had just walked across a desert.
Each lab no doubt has their own secret recipes; precise volumes of specific dyes to achieve consistency in the colouring of the mixture. Steel containers full of sand are quenched with the dye mixture, enough to coat all the sand grains, before being placed into an oven to dry overnight. And then, finally, you can go home. However, notwithstanding the fact that you decided to tape the two pairs of gloves that you are wearing to your labcoat, despite the goggles and the face mask, and regardless of how careful you may have been, some dye will have found its way onto your face. Good luck washing that off.
Sometimes experiments just fail
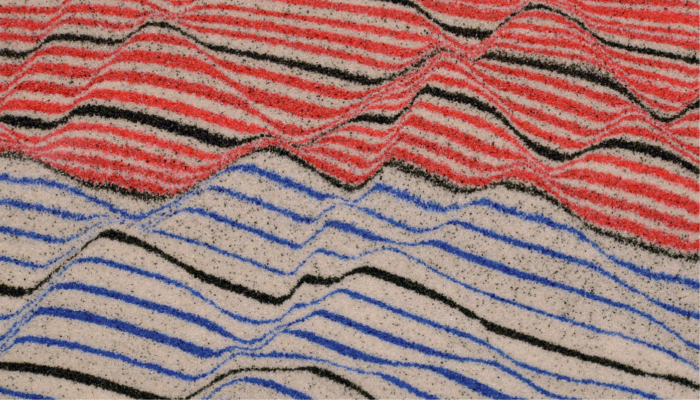
Modellers will tell you that failed experiments always teach you something (and that’s true) but, between you and I, at times you will want to pull your hair out. The smallest of factors can hold sway over an experiments (undesired) development. For example, see that tiny gap in the lower-left (yes, the really small one) in figure 1?. That ‘sinkhole’ is acting as a seed point, strongly influencing the structural development of the model. At this point there’s no salvaging it. It still looks cool (I mean, look at those relay ramps!) but the main purpose of the experiment is defeated because the way in which it is evolving is controlled by that singularity. For the modeller, that means getting the vacuum cleaner and start setting up the experiment all over (this time without leaving a tiny, almost-unnoticeable, gap between the glass and the backstop).
Fig, 1: A beautiful, but “failed”, extensional sandbox model
You’ll lose track of time and space
Analogue modelling labs could quite easily double as photography studios. Experiments are monitored closely, often with several cameras, to capture their evolution in detail. To get the best results, natural light is not welcome in the lab while an experiment is underway. Actually, neither is any light source which doesn’t have the sole purpose of illuminating the modelling rig. That means lights out and blackout coverings on all portals to the outside world. Couple this with hours of fixation on your experiment and you can perhaps appreciate why this geologist has experienced stepping outside into several inches of snow, while wearing shorts.
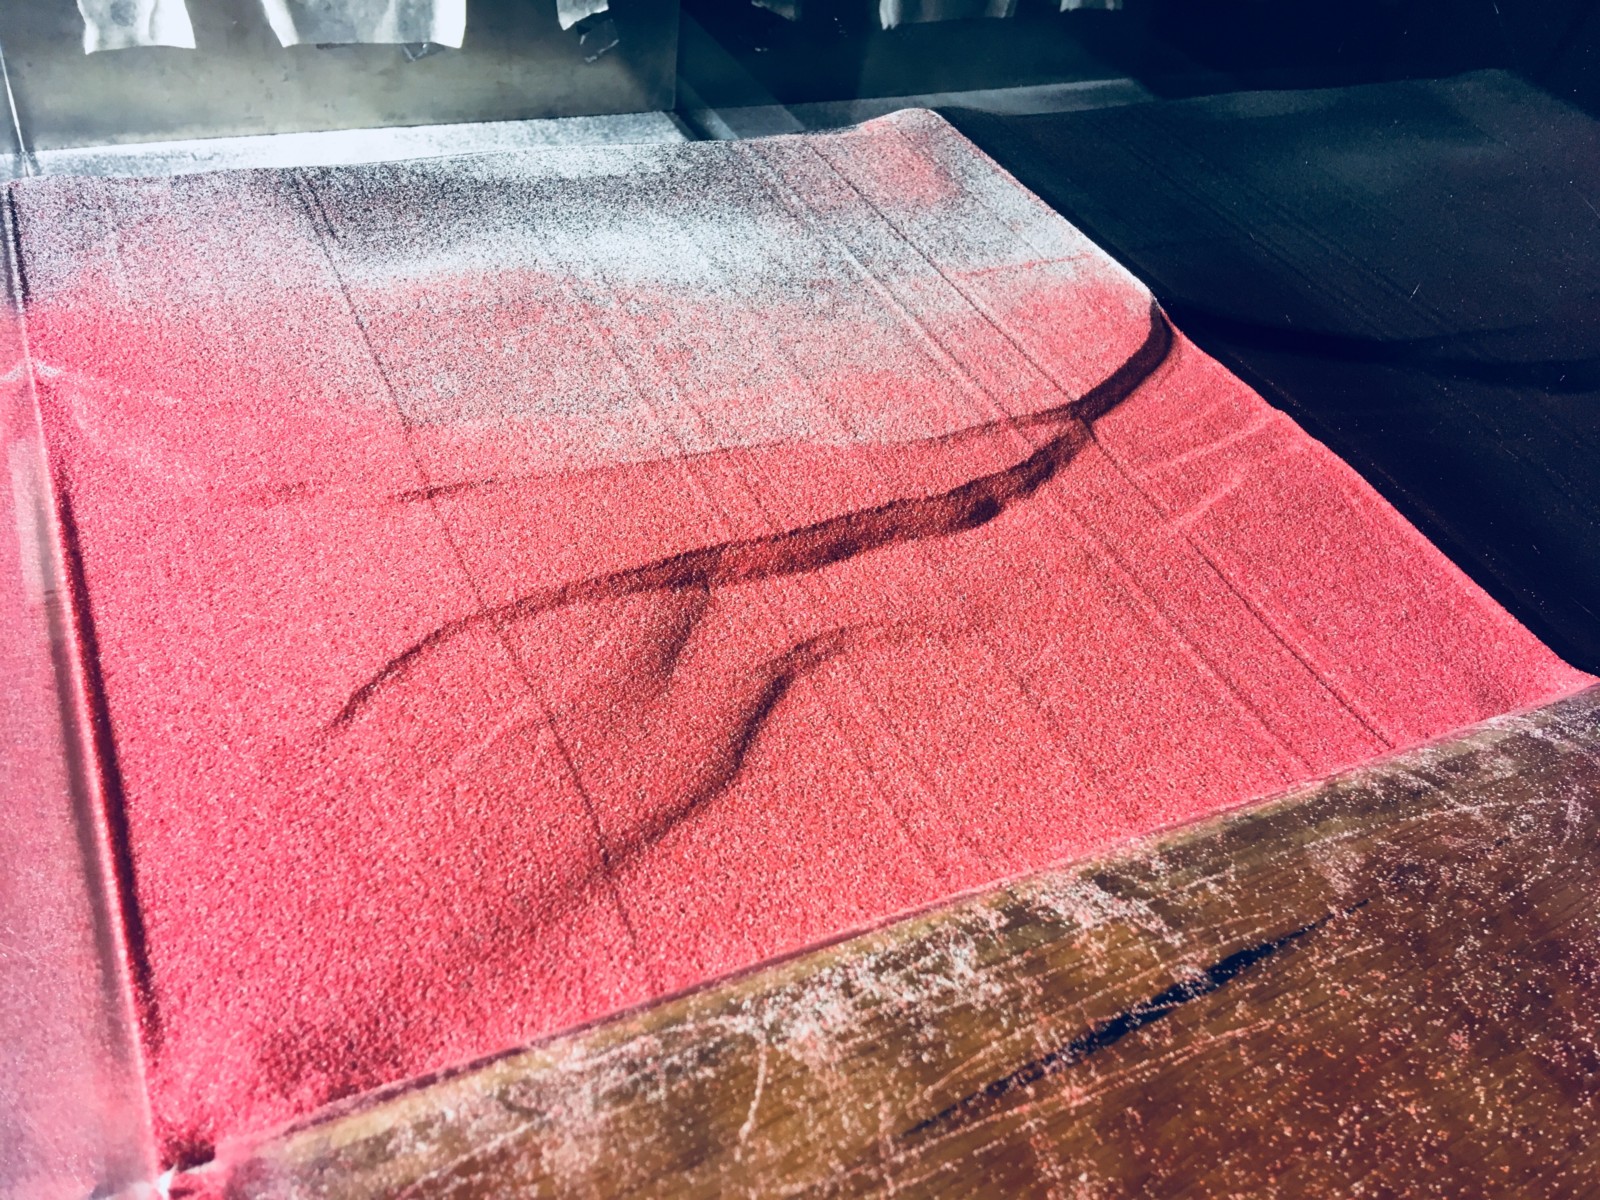
In some instances, the internal architecture of analogue experiments is monitored by placing them inside CT scanners but, most often, the only way to see inside is to cut into finished models. In order to do this, they are first set using a gelatine mixture (yes, I mean the stuff in your kitchen. When mixed with sand its smell is rather…unique ). As the gelatine sets, the model will stiffen and, then, à la Goldilocks, when the model is just right, you can slice it wafer-thin, photographing it as you make your way through. Do it too soon, and the model will simply crumble in your hands. Leave it too late and the model will be effectively lithified. To add a layer of complexity to this already frenetic race against time, certain materials used in analogue modelling (for example certain silicon polymers, used to represent halokinetic sequences) flow under the weight of gravity. This means that, once you start slicing up a model, there is no stopping until it is done. Make sure you’ve had your morning coffee!
The highs definitely outweigh the lows
Don’t get me wrong, nothing beats watching a tiny rift valley developing inside of a glass box over the space of a few hours. No matter how many times you see it, you will never grow tired of it. All the hard work is paid back tenfold by the amazing insight that models like this give us into the workings of the natural world. Whilst their numerical counterparts are certainly less messy and require less heavy lifting, one aspect they’ll never be able to improve upon (at least in this scientist’s opinion) is the element of satisfaction.
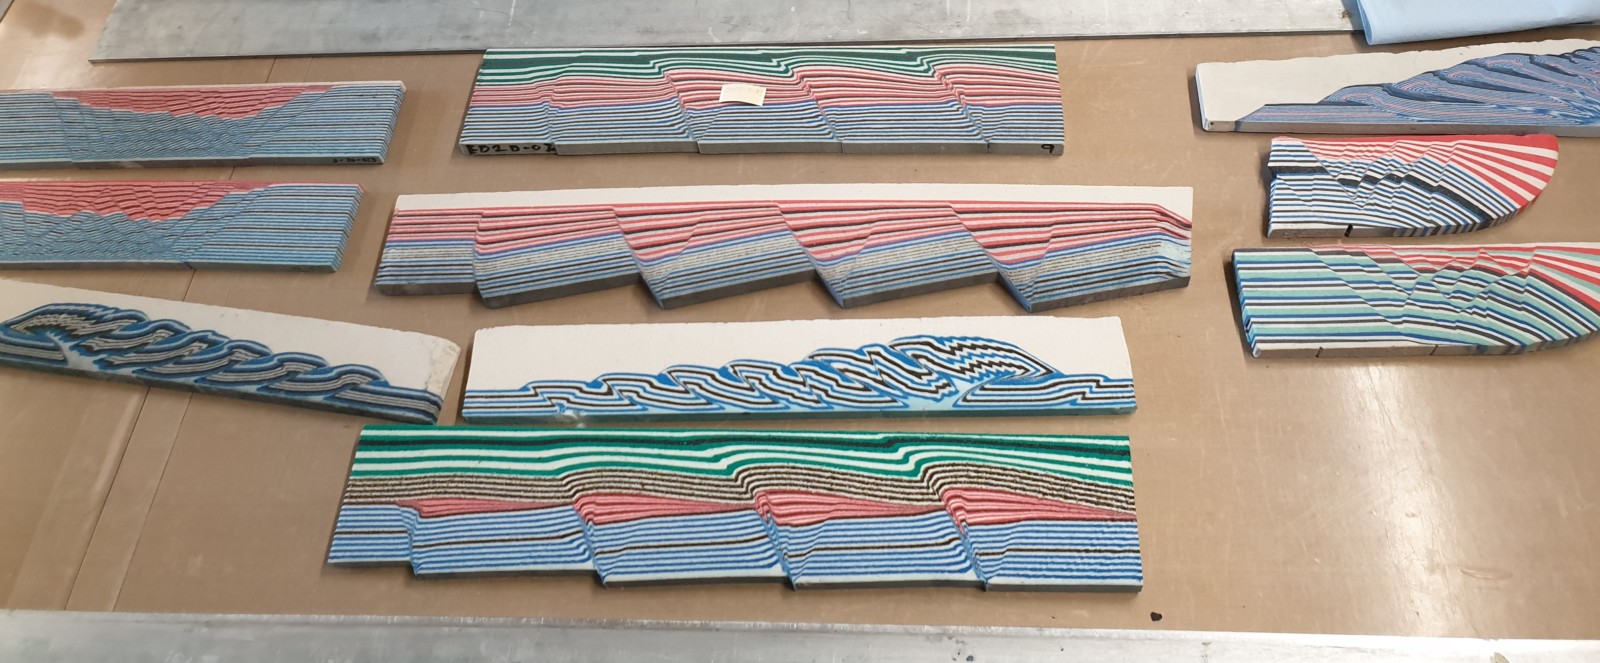
A selection of sandbox model slices (FDRG Modelling Labs, Royal Holloway)
Further Reading:
Hubbert, M.K. Theory of scale models as applied to the study of geologic structures (Geological Society of America Bulletin, 1937)