We geoscientists need all different kinds of data: soil moisture, water-levels, snow height, radiation, precipitation height and the list goes on. However, the devices we need to generate that data are often too expensive, not available or even don’t exist. Therefore, it’s sometimes necessary to build them yourself (like many geoscientists do – those who annually present their senors projects in the MacGyver sessions at EGU and AGU). These DIY projects are often cheaper and better adapted to specific needs.
For instance, in my PhD, I want to sample precipitation for isotope analysis, distributed over a whole catchment. However, available samplers are expensive and not evaporation-safe. These are both no-goes for my project. By tinkering a bit with some self-taught microelectronics and 3D printing, I got a cheap and evaporation-proof autosampler! This miniseries aims at conveying the basics of DIY (“Do It Yourself”) for Geosciences so you too can measure whatever you need and build your own devices.
Basic set-up of a device
Most self-made devices work like an organism:
- Microcontrollers are the brain, controlling everything.
- Microelectronic components like temperature or light sensors act similarly to sensory organs, like eyes or ears
- Circuit boards are the nerves, connecting sensory organs to the brain
- 3D-printed parts build the body or shell, protecting everything
In this miniseries, each of these will be part of a separate blogpost. This first post features the brain: Microcontrollers.
Part 1: Microcontrollers
Microcontrollers come in different shapes and sizes, equipped with various parts, connectors and features. Their core task is to manage microelectronics by giving and receiving signals. From a thermometer, for instance, the controller will receive temperature signals, while motors need instructions from the controller on how to move. Deciding which microcontroller to use is often the hardest part of a DIY project. Depending on which and how many microelectronic components you want to manage, different controllers exist. Here is a small, far from complete, overview of a few popular devices:
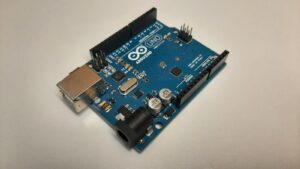
Arduino Uno – Picture by the author
The Arduino Uno from the crowd-sourced Arduino project is probably the most popular microcontroller. Developed fully open-source, it contains a variety of features such as 20 pins for signal in- and outputs (the black bars in the picture), a USB port (the silver box) and a power connector (the black cylinder in the front). There are also many other microcontrollers from the Arduino line, like the larger Arduino Mega (60 signal pins) or the very small Arduino Pro Mini. While they are not the cheapest (10-20 €), they are really user-friendly and good starters (I personally started with an Arduino Mega).
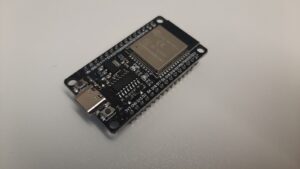
ESP32 Dev-Module – Picture by the author
The ESP32 Dev-Module by Espressif is a cheaper (6-10 €), more feature-packed alternative to Arduinos. It comes at a compact size while still having up to 34 signal pins and useful components such as a Wi-Fi antenna, Bluetooth and touch-sensitive pins. What makes this controller really valuable for geoscientists is the extremely low power consumption in its deep sleep mode. For instance, my precipitation sampler only needs to operate in fixed 1-week intervals. Having the controller only use full power and “sleep” in between intervals drastically improves battery life. Also, it features a USB Port, which makes connecting to a computer easy for programming.
You can program all Arduinos as well as the ESP32 using the open-source Arduino IDE software compiler. The language is similar to C++ and really easy to learn. There are lots of tutorials and example scripts available online. I personally often use the Website randomnerdtutorials because of their clear structure and simple explanations. Thanks to a large community, there also exist lots of additional libraries to control all different kinds of components.
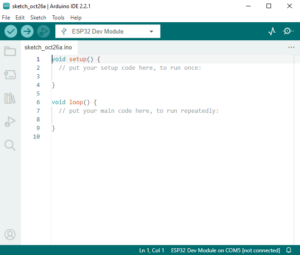
Screenshot from the Arduino IDE (Software by the Arduino project
The different microelectronic components will be part of the next blog post in this miniseries. There, I will present some sensors and components especially useful for DIY in geoscience.
Concluding with a tip: Borrow or order an Arduino or ESP starter kit. They start at around 20€ and give you all the important components you need to learn microcontroller programming and application. Some even come with their own handbook full of tutorials, giving you a great step-by-step intro.
Edited by B. Schaefli