Not so long ago, almost all hydrologic data depended almost exclusively on fieldwork. Today, sure, you can download data from repositories, there are satellites that beam you magic numbers that you can interpret to give you almost any variable, and some (less than we might hope) long-term monitoring has been outsourced to governments (or in some cases to citizens with sensors). But somewhere in there, someone has to do fieldwork. So, just in case you are among the deprived few who are chained to your office chair, I’ll share some of my favorite overlooked tips for the lost art of fieldwork so you can fool your students, professors, and colleagues.
Write on Paper
First of all, get a notebook and use it. And no, I don’t mean a notes app on your smartphone; I mean paper. And not just any paper, but I highly recommend purchasing waterproof paper notebooks. Water-resistant paper is essential in hot climates because that trickle of sweat down your arm will dissolve “normal” paper. On rainy days, you might be forced to huddle under a tarp to take your notes. On snowy days, all the layers you wear will create a humid microclimate that similarly melts your paper. The main brand I know is “rite in the rain”. They carry all kinds of notebooks and printer paper, so you should be able to find a good match. In Switzerland, when I initially looked, I could only find it at a distributor that mainly supplies hunting gear, but in other countries, you can find it even in recreational equipment stores. One last hint here – use a regular pencil or a pen made for astronauts with impervious paper, as the special coating of the paper makes regular ink hard to use.
Make a memory
When we write, we take the time to observe where we are. Always write a description of the weather, of what happened, and what you did in addition to the obvious – the ID numbers of the samples you collected, the number of screws you need to bring next time for your weather station, the date and the time, etc. Those little hints will be invaluable in reminding you of the field day when reconstructing the day’s story. I’ve figured out where unlabeled samples came from just from some scratches on the paper. But that’s not all – and here you can use your smartphone if you have to (not a best practice though because you might need that battery to call a rescue helicopter later) – take pictures. Those pictures can help you decipher all the variables that you didn’t set out to measure but might be the ones that solve the mystery of your data. It will help you remember if there was snow or whether it was cloudy (maybe those funny isotope values are due to fog deposition? (e.g., Berry et al., 2014). When in doubt, take one or two extra pictures to help you retrace the conditions and what happened.
Don’t be Anonymous
While we’re talking about retracing, you might want to leave some breadcrumbs so that your equipment might be able to refind you. A hiker recently mailed us one of our sensors she found hiking. It wasn’t labeled, but somehow she figured it out. However, we have had great success labeling our equipment. I recommend looking to climbers for field-ready labels.
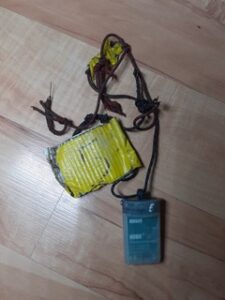
A sensor recovered in the fall of 2023 from the Vallon de Nant, Swiss Alps
Know your Samples
The other label, of course, is your sample. The best practice for labeling is to label with abbreviated sample IDs (12 characters or less), including a prefix or line for the person or project and a unique serial. All metadata should be recorded with ID in an accompanying field notebook (see above tip). I don’t think the sample ID should be place or time-specific to make its use flexible. I print labels and tape them on with heavy-duty, clear packaging tape. In the field, record the metadata (location, place name – GPS coordinates are not usually repeatable, accompanying measurements, personal observations, date and time) in a field notebook. Quickly after arrival (same day, preferably), digitize all metadata and back it up. A student once lost all her notebooks from a field project with me in airport customs and had no copy anywhere.
While talking about samples, if you have a friend who likes to analyze isotopes, always bring a small vial. Isotope analysis only needs 2mL (usually, unless you have special micro-drop vials). Just ensure they are hermetically sealed and can’t lose water via evaporation from inappropriate caps or being left in a hot place. Fill the vial to the top so fractionation can’t occur within the vial.
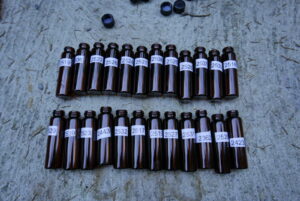
Water samples for isotope analysis in 12 mL vials labeled with serial numbers.
Don’t forget your safety … and tools
On top of these tips, you should, of course, think about your safety, weather preparedness, whether the fieldwork is inclusive of your diverse team (Lawrence & Dowey, 2022), navigation to and around the field site, the devices that you are working with, how they work, review their manuals, and pack measuring equipment, extra batteries, some zip-ties, duct tape, emergency numbers on paper, and all the necessary tools. I always bring a multi-tool knife for good luck, and I think I can safely say it has saved my life multiple times, not to mention all the sensors and data.
Keep the people in mind
Last but not least, remember the people. Every place, even the most remote, seemingly distant location, is the center of somebody’s universe. Please work with respect for the people whose home it is, find common goals, collaborate if possible, and expand your focus by seeing the place through someone else’s eyes.
Edited by B. Schaefli


