Science communication is becoming a widely recognized skill for both established and budding geoscientists alike. Outreach activities are beneficial in many ways, as they not only showcase science to the general public, but also give scientists the chance to develop transferable skills.
If you’re in the market for a creative geoscience activity, one that especially appeals to a younger audience, look no further! In this guest blog post, Stephanie Zihms, a geomechanics postdoc at Heriot-Watt University and the EGU Union-level ECS representative, details a fun hands-on activity that teaches geoscience with the help of Lego blocks. This post is modified from a version which first appeared on Stephanie Zihms’ blog. Read the original post.
I designed this activity for the Explorathon 2015 (a family orientated science event) because I was looking for a way to show how geologists work from observing the surface to gathering information from boreholes and seismic surveys to understand the subsurface. I also wanted participants to experience this process without needing to be in the field or taking rock samples.
Kit and preparation
I used a generic brand of building bricks (because my budget didn’t allow for actual Lego) and bought two boxes of mixed bricks in a bargain store. First you want to sort the bricks by colour (unless you can buy them that way). Then you want to decide what shapes to make – I opted for three simples shapes: Syncline, Anticline and Oil Reservoir with seal.
-
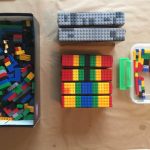
- A shoe box of leftover LEGO, the 6 models from top, and a tub with the LEGO borehole
-
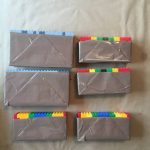
- The 6 models covered so only the top layer can be seen
-
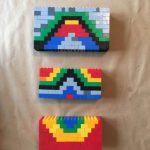
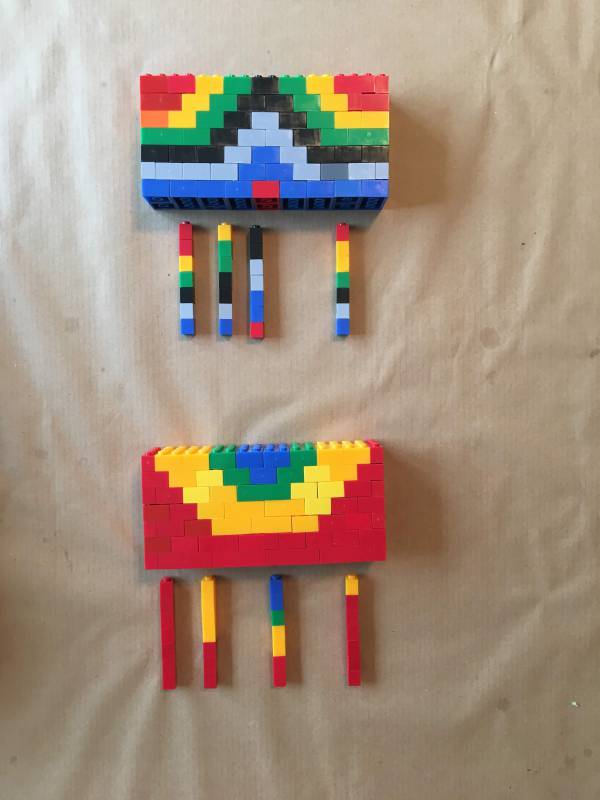
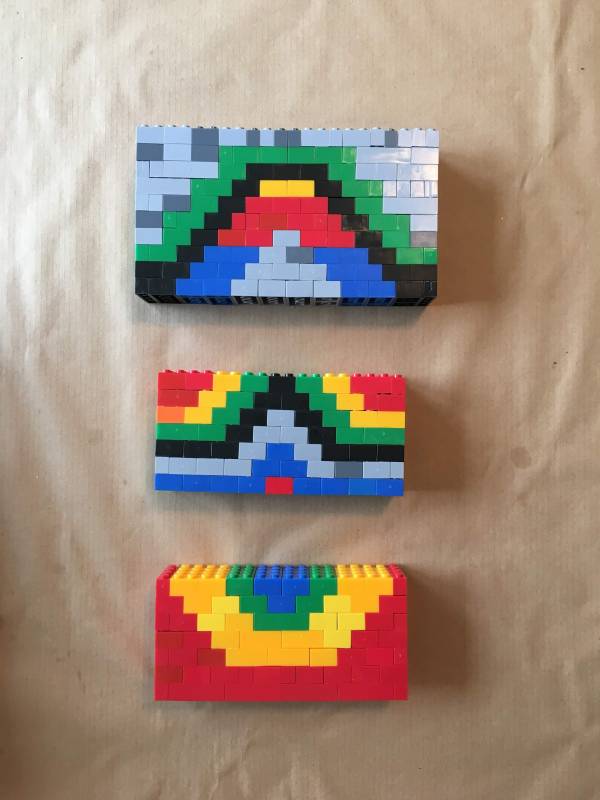
- A model example each uncovered to show the structures
With the geology built, you then want to select three or four areas to make a ‘borehole’ with – I used single bricks but this could be done with the 2×2 squares as well. If you have enough bricks you can probably incorporate the ‘boreholes’ into the model and reveal them by extracting them – which would be super cool. Once you have the models built and boreholes prepared, you need to make some envelopes to only expose the top layer – I used brown hacking paper and packing tape to make sure they can be reused easily. That’s pretty much it.
Activity: Syncline & Anticline
Show your participants the covered models and ask if they can tell you what the rest of it looks like. You can explain that geologists use exposures like this for mapping (having maps on hand can be useful). Also ask how sure they are that they are correct based on the information available. You can then offer more information in form of boreholes – either lay or stand them in front of the model in the correct place (you can mark your envelopes) or extract them if you went for the hiding option.
-
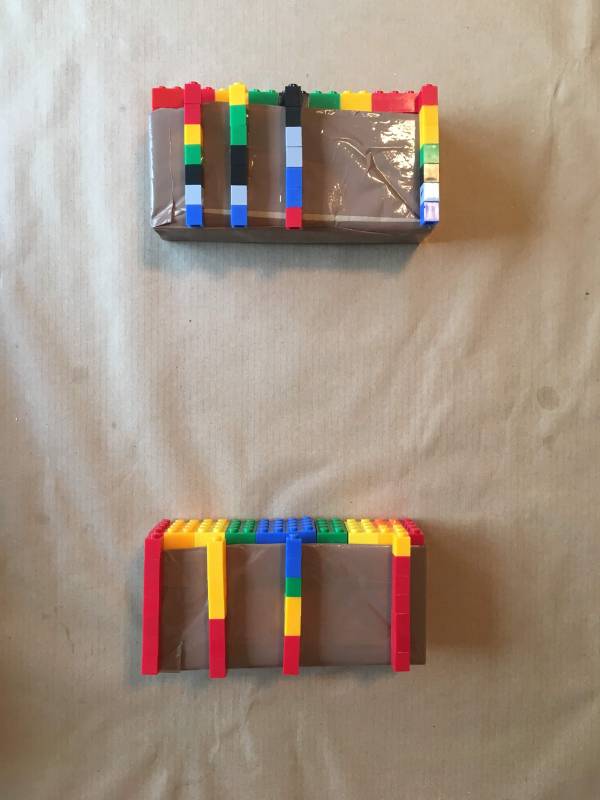
- The hidden models with the ‘boreholes’ in the corresponding place
-
- The exposed model with the ‘boreholes’ in the corresponding place
Either ask the participants to show you what they can see – following a colour for example or ask them to copy the boreholes on a bit of paper and connect colours that way (this will depend on how much time you have with each participant; borehole papers can be prepared with the columns printed on so the participants only have to colour them in).
Once that is done reveal the full model. This is normally a big ‘Ahhh’ effect because just by having that little bit of extra information they got it right. This is a great opportunity to talk about information available and how geologists infer maps and what the subsurface looks like based on similar information. (if you have boreholes logs from the local area + the iGeology app from BGS this can really help relate this to the local area). If you make a version where the boreholes can be retrieved this could be standalone activity with instructions to follow as well.
Activity: Oil reservoir with seal
This activity is very similar to the one above except that we can’t see anything from the top layer. And before we even know where to drill for a borehole we have to do a seismic survey. After guessing what the model looks like and deciding the information is not great. Show a generic seismic line (normally easily found online or in petroleum engineering tutorials). We printed seismic lines on A5 and asked participants to colour them in – following any features or structures they could see (this could also be done with one A3 paper that’s laminated and can be re-used).
After identifying a generic reservoir structure we revealed the model to show the different layers. A set of boreholes could be done based on where participants would ‘drill’. Which would mean having a set of boreholes available or making the middle of the model retrievable.
-
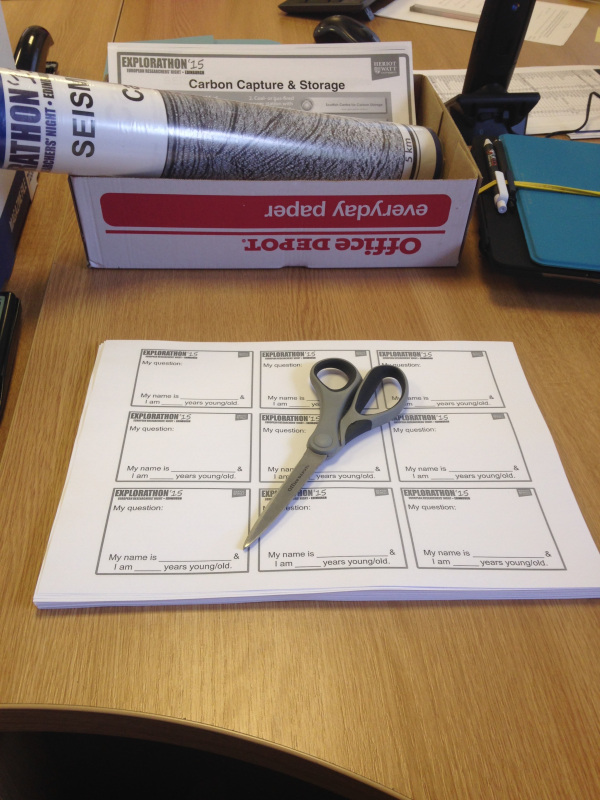
- A sheet of questions for participants & seismic line in the background
-
- A model example each uncovered to show the structures
Summary
I absolutely love this activity because it uses something people are familiar with – independent of age and it mimics a little geological survey taking participants on the journey of gathering information and making an estimation. This activity can also be easily amended for different size audiences (e.g. using DUPLO for a show & tell type event) or adding more information about the process, talking about risk and uncertainty. The response from participants, especially children, when the model is revealed is priceless.
I hope you found this how-to useful and please share how you used it at your events either in the comments or by tagging me (@geomechsteph) on Twitter.
By Stephanie Zihms