Soaking up the sun and recharging batteries on a peaceful and quiet summer day, or fighting to stay upright during extreme snow storms in the middle of winter, while continuously recording valuable air temperature, pressure, wind-speed and so much more – such is the life of an automatic weather station on the Greenland ice sheet. Even though they are so remote, sitting by themselves surrounded only by the flat, white and snowy surface of the ice sheet, they are in constant communication with us. They’re telling us a story of how they feel and, more importantly, what they are feeling. Their story then gives us incredible insight into the weather, climate, and surface conditions on the ice sheet. There are over 35 weather stations on the Greenland ice sheet, providing the crucial information needed to understand and predict how the ice sheet will change into the future. In Spring 2022, I had the opportunity to visit and install new weather stations as part of the GEUS-led Greenland Climate Network (GC-Net) monitoring program. In this blog, I want to bring you along my GC-Net fieldwork journey and tell you the story of how a new weather station is set up and the types of measurements it can provide.
GC-Net weather stations
In 2021, the Geological Survey of Denmark and Greenland (GEUS) took over the GC-Net weather station network originally established by the Cooperative Institute for Research in Environmental Sciences (CIRES) at Colorado University, Boulder, with support from NASA and NSF in 1995. There are currently 16 automatic weather stations (AWS) within GC-Net, distributed in the interior part of the Greenland ice sheet. GEUS also runs the Programme for Monitoring of the Greenland Ice Sheet (PROMICE) with 18 AWS along the Greenland ice sheet margin. Data from these weather stations are transmitted via satellite link in near-real time, not only to ensure they are still working, but so researchers all over the world can monitor current and past weather conditions. In fact, each weather station sends about 11,000 messages per year, and data scientists at GEUS are currently processing these data and working towards making them available as open access datasets to the broader community, similarly to the already published historical GC-Net data.
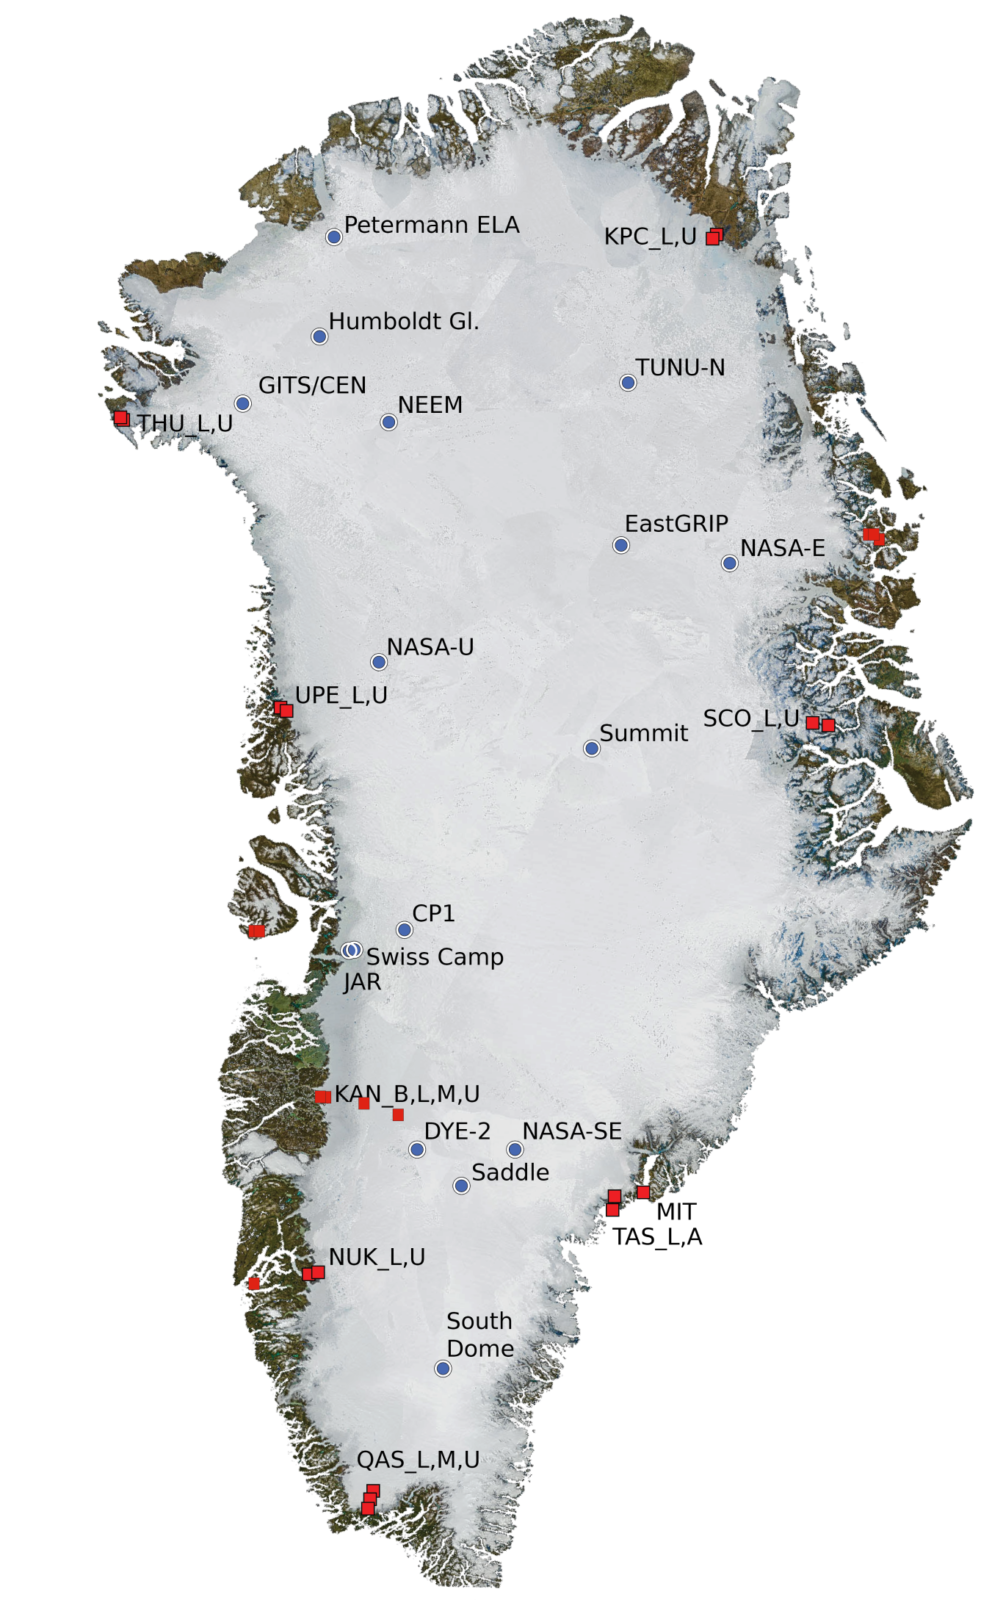
Map showing the locations of the GC-Net (blue) and PROMICE weather stations (red). Photo credit: GEUS.
Although the weather stations are designed to be tough and rugged, the harsh conditions – especially during winter storms – can take a toll on their sensitive instruments. And because the GC-Net stations are set up in the accumulation zone, where there is more snowfall during winter than melt in summer, the weather stations gradually get buried over time. Therefore, we at GEUS have to visit and service these weather stations on a regular, ideally annual, basis. These visits give us the opportunity to physically inspect each of the weather stations, and of course, comes with the welcome side-effect for us to get out of a usually rainy Copenhagen spring and into the field.
In 2022, two GC-Net field trips to service existing – and install new – weather stations were undertaken; one covering the eastern part of Greenland (see blog post from Penny How) and one covering the southern and western areas, which I took part in.
Setting up a new weather station
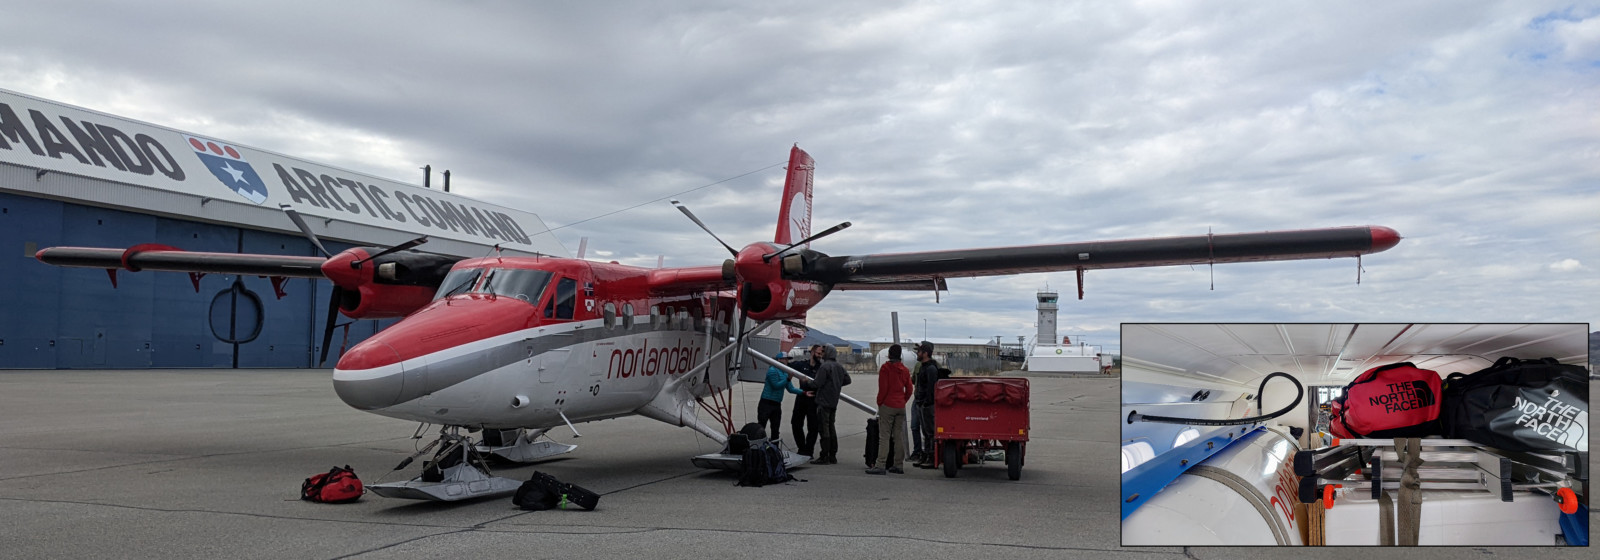
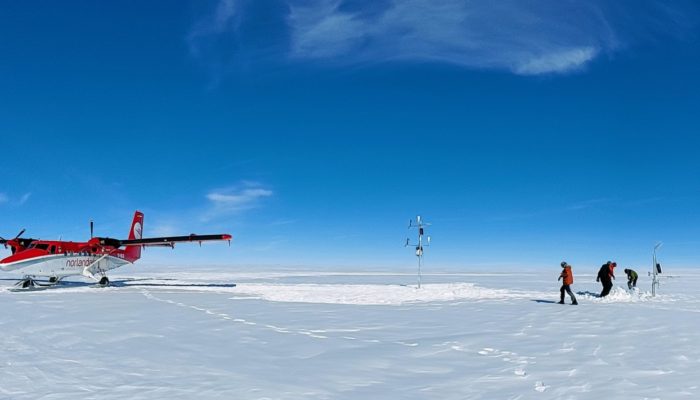
Loading the Twin Otter aircraft the evening before flying to the ice sheet. Photo credit: Ken Mankoff, Anja Rutishauser (inset).
To reach the weather stations, we fly in with a Twin Otter plane from either Kangerlussuaq, Ilulissat, Upernavik or Qaanaaq. To maximize the amount of time on the ice, we typically load the plane with our equipment the evening before. The packing process is a life-sized game of Tetris, and with all the loading, deloading and loading again due the many logistical- and weather-induced changes to our plans, we now are self-proclaimed masters of “Twin-Otter-Tetris”.
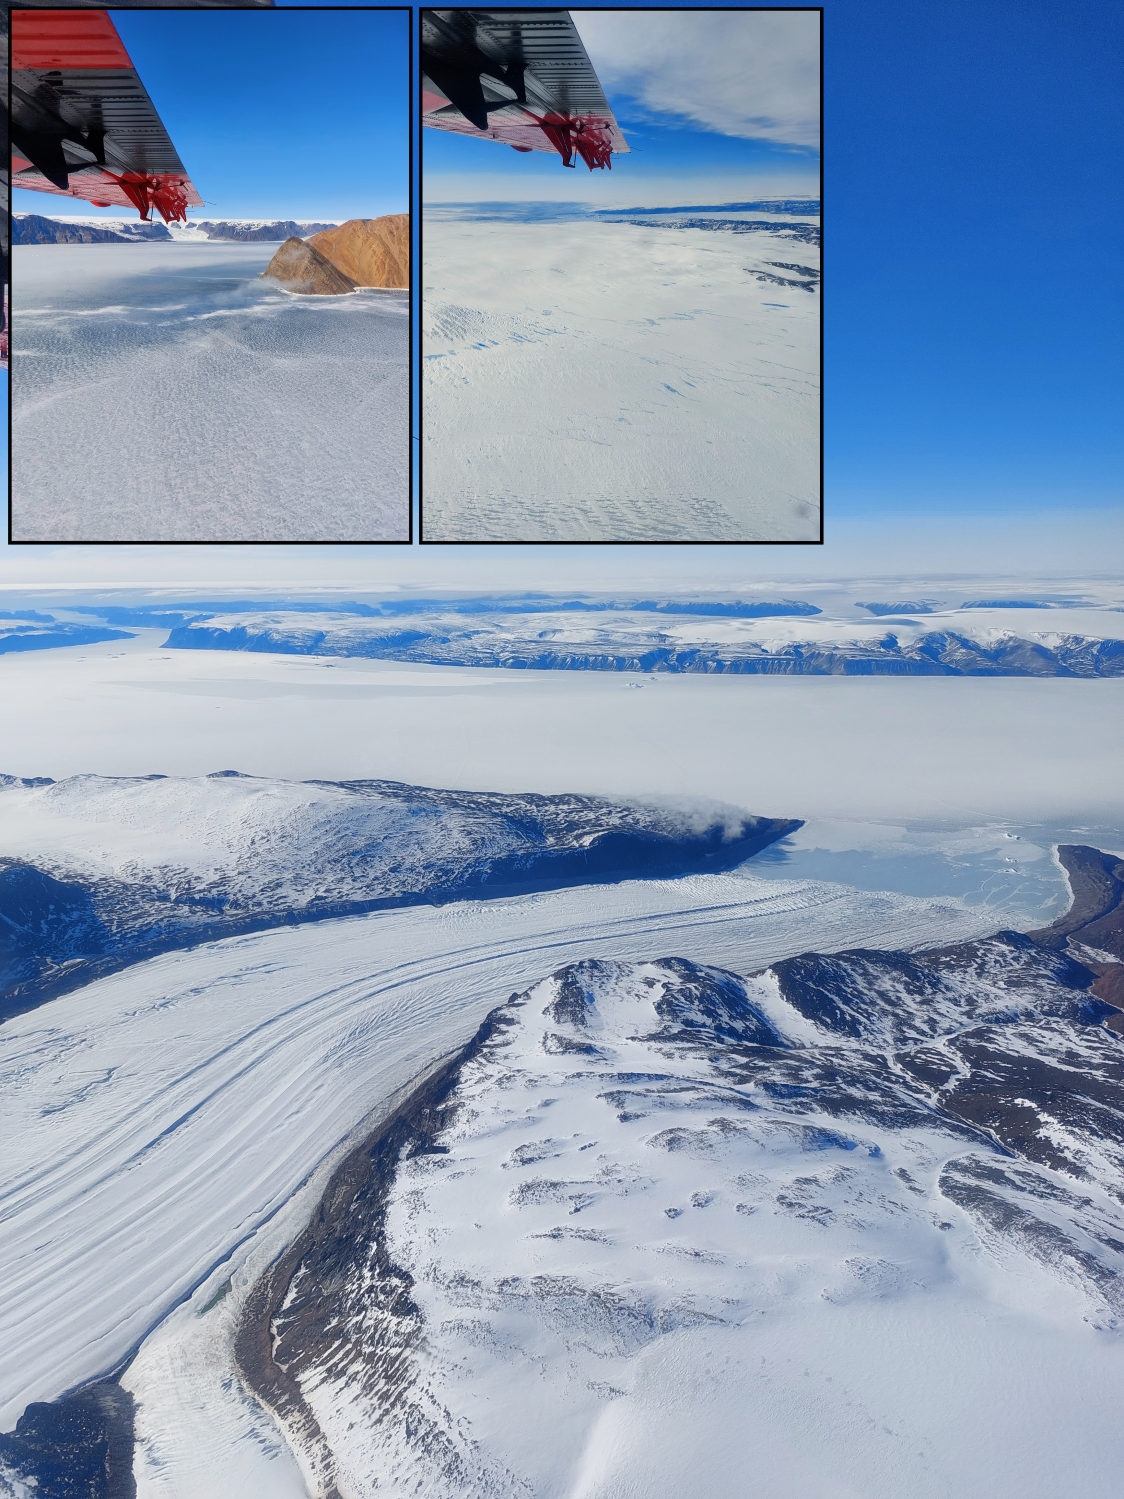
Enjoying the beautiful views during the Twin Otter flights to reach the weather stations. Photo credit: Anja Rutishauser.
During the 1-2.5 hour flights to the weather station sites, we get to enjoy the absolutely stunning views of frozen fjords, outlet glaciers and the mesmerizing wind-blown and melt-feature patterned ice sheet surface – not a bad view for our flying office week! As soon as the plane gently lands at our field site, the “countdown” to take-off starts and we get to work. We typically have only 5-7 hours time to get the weather stations ready for another lonely year on the ice.
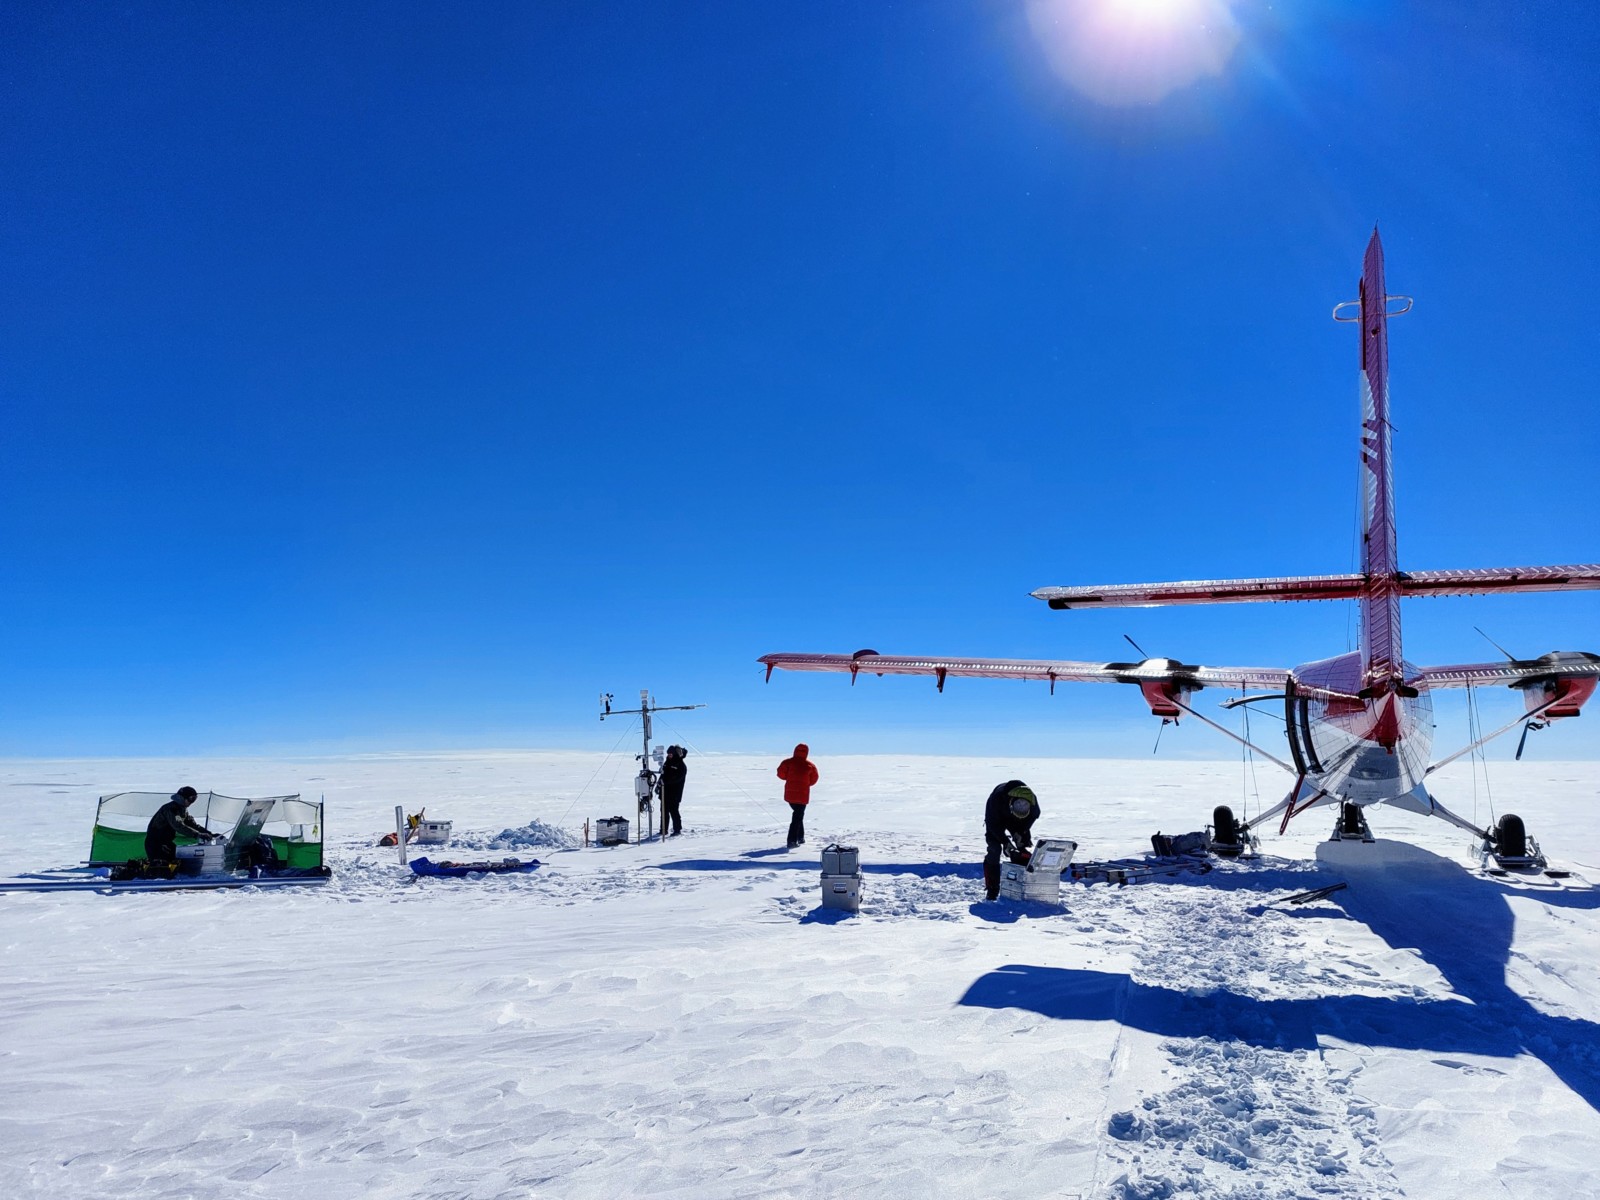
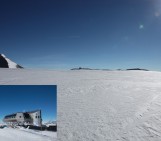
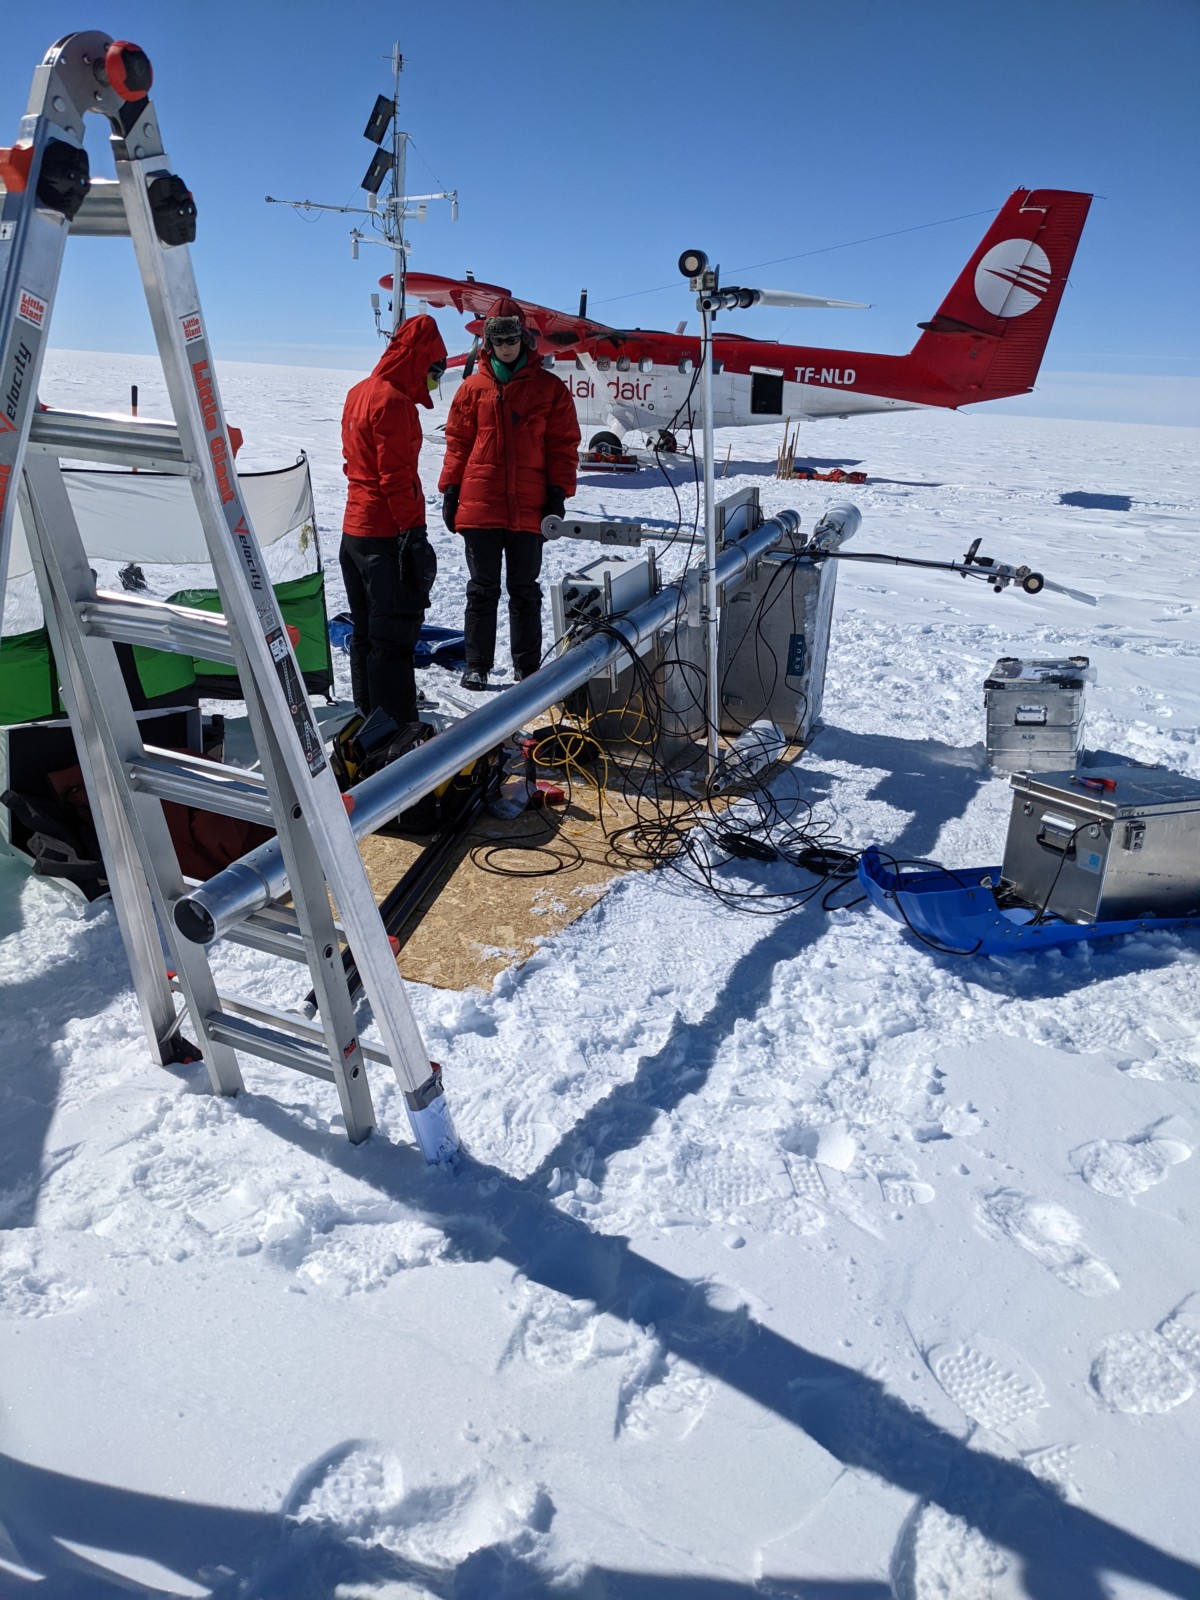
A few minutes after landing at Crawford Point (CP1): Boxes with equipment are offloaded, a windshield for a work area is set up, and data is downloaded from the pre-existing station before replacing it with a new one. Photo credit: Anja Rutishauser.
Although we hadn’t worked together in the field before, we were a really well oiled team – maybe all the downtime due to weather and logistical delays was at least good in the sense that we had lots of opportunities to prepare for when, how, and what each of us needed to do in order to be efficient as possible as a whole when we’d get to our sites. While some of our team are offloading the plane, others are setting up the weather station assembly area with windshields and plywood, working through a checklist of tasks for the pre-existing weather station (if there was one) or starting to dig a snow-pit for snow density measurements.
Assembly of a new GC-Net weather station: instruments are installed on the side booms, which are then mounted on the main mast. Photo credit: Ken Mankoff.
The GC-Net weather station consists of a main mast and two sidebooms that hold all the different instruments. To begin the assembly, all instruments are installed on the two side booms, before being mounted on the main mast together with the recording box and the solar panel. Because the weather station is almost 4 m tall, with the instruments mounted as high above ground as possible to avoid getting buried in snow, most of the station is assembled on the ground before raising it vertically. Luckily for us, the engineers at the GEUS glaciolab prepared the weather station kit in an easy-to-assemble way – keeping true to Denmark, it’s almost like a giant Lego-kit. All one needs is a 13 mm wrench (the “golden tool” amongst our GEUS field team), a drill to bolt the mast together, and a few zip ties (or the all-so-versatile duct tape) to keep the cables together.

After raising the weather station, all loose cables are secured to the mast and the battery box is ready to be buried beneath the snow surface. Photo credit: Nanna Karlsson.
After most of the instruments are assembled on the weather station and all sensors have passed the “ground-test”, it is time to raise the station. This is an “all hands on deck” moment, and requires equal amounts of balance, strength and team-communication: “Up, left, forward, a little back, back, … wait, ok, go”, followed by loud cheering – and that’s the moment the new weather station is standing tall at its designated location. For me, this was certainly one of the most thrilling moments of our fieldwork, experiencing the “birth” of a new weather station on one of the most remote places on Earth.

Logging of the firn core density. Photo credit: Anja Rutishauser.
The final touches on the newly-setup station include installing the thermistor string to measure subsurface snow and firn temperatures, burying the battery box, and securing any remaining cables. The battery box is buried 20-30 cm below the snow surface to shield the batteries from the extreme cold air temperatures during winter (snow is an excellent insulator). The thermistor string is installed in a 10m deep firn core hole, initially drilled to measure the firn density – measurement synergy at its best. The firn core and snow density measurements (from the snow pit) provide additional information that, along with the weather station data, allows to develop better mass balance models for Greenland.
Once the final instrument checks are done, we play another round of Twin-Otter-Tetris, and it’s time to say good-bye to our weather station. As the plane takes off, the weather station quickly becomes a tiny dot behind us, standing out against the vast, white surface of the ice sheet. We hope that it is ready for a year (or more) of collecting data and telling us its weather and climate story. And of course, we will be keeping an ear out for it from our offices back home in Copenhagen, where we expect to receive a quick “hello” and update from the station every hour.
What are the weather station instruments and what do they measure?
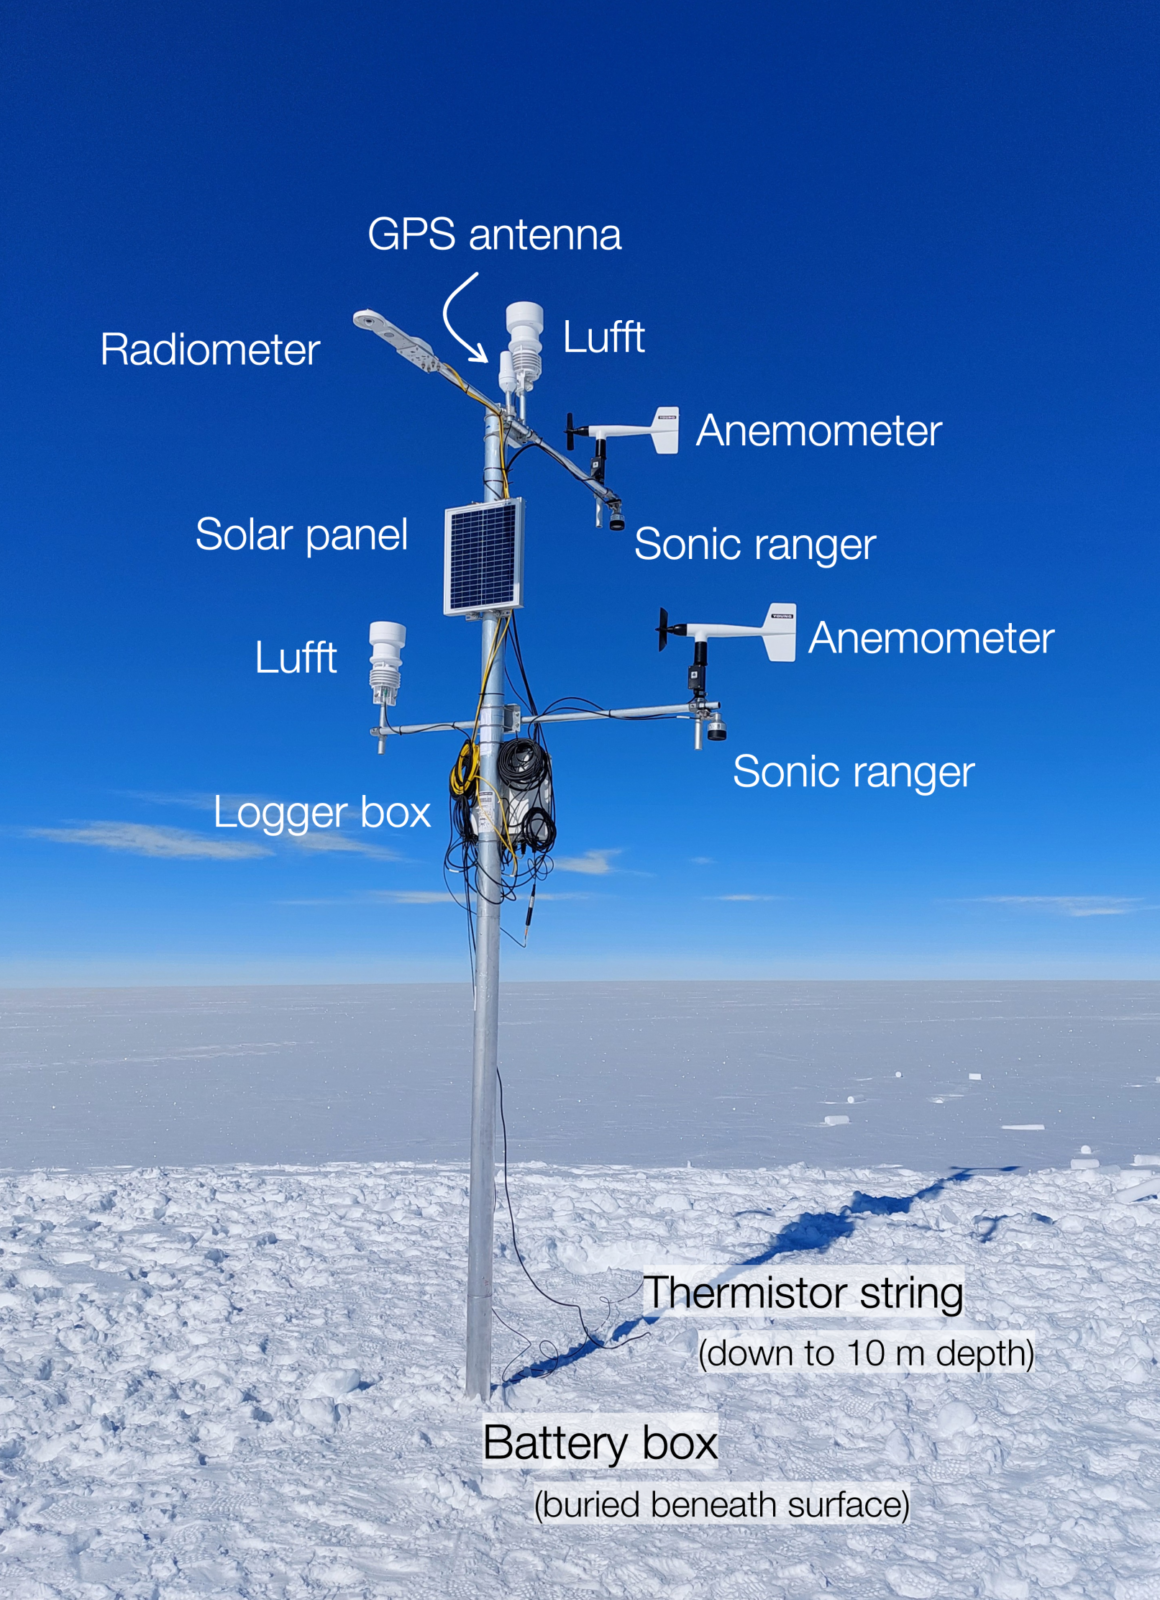
Typical GC-Net weather station with all instruments. Photo credit: Anja Rutishauser.
There are a total of five different meteorological/glaciological instruments attached to a typical GC-Net weather station. Some instruments come in pairs, with one on the lower and one on the upper boom. Instrument pairs are important and allow to calculate turbulent fluxes and provide redundancy in case of damage through the year.
- Lufft: Measures the air temperature, relative humidity, air pressure and consists of a tipping bucket to measure precipitation (used to measure rainfall during summer).
- Anemometer: Measures the wind speed and direction.
- Sonic ranger: Measures the distance to the snow surface, which can be used to estimate changes in snow cover thickness and snow accumulation rates.
- Radiometer: Measures the incoming and outgoing radiation, which is used to derive heat fluxes.
- Thermistor string: Measures the snow and firn temperatures at 1 m depth intervals down to a depth of 10 m.
- Logger box: This is the brain of the weather station, where all instruments are connected to a data logger that records the measurements. The data is stored on an SD card, as well as sent to GEUS every hour via a satellite link.
- GPS antenna: GPS antenna is used to send the weather station data back to GEUS, and measures the exact position of the station.
- Solar panel: Keeps the battery alive – charges the batteries in the battery box when daylight is available.
- Battery box: Buried below the snow surface, containing six 12 volt batteries to power all the weather station instruments.
Further Reading
- Historical GC-Net data can be accessed from the envidat page or visualized here.
Edited by Marie Cavitte
 Anja Rutishauser is an early career researcher at the Geological Survey of Denmark and Greenland (GEUS) based in Copenhagen, Denmark. Her current research focuses on the application of geophysical techniques to study the near-surface firn of the Greenland ice sheet and monitor changes in firn under the current climatic warming conditions. Anja strives to find novel ways to observe these processes and improve our understanding of their impacts on the future Greenland ice sheet mass balance. You can find her on twitter as @anja_ruti, and contact her via aru@geus.dk.